
Installing a Squid proxy server is a powerful way to manage network traffic, increase security, and control access to the Internet. In this article, we will explore how to configure Squid using the command line interface (CLI) on Ubuntu, CentOS, and Red Hat Enterprise Linux (RHEL).
Introduction to Squid Proxy
Squid is a widely used open-source proxy server that provides caching, filtering, and forwarding capabilities. It acts as an intermediary between the client (such as a web browser) and the web server, improving performance and security.
Prerequisites
Before we begin, ensure that you have the following:
- A Linux-based system (Ubuntu, CentOS, or RHEL)
- Terminal access with administrative privileges (sudo or root)
Installing Squid
Let’s get started by installing Squid on your system:
How to install Squid Proxy on Ubuntu?
sudo apt update
sudo apt install squid
How to install Squid Proxy on CentOS and RHEL?
sudo yum install squidConfiguring Squid
- Open the Squid configuration file:
sudo nano /etc/squid/squid.conf - Customize the configuration according to your requirements. Key settings include:
- http_port: Specify the port on which Squid listens for HTTP requests.
- acl: Define access control lists to allow or deny specific clients.
- cache_dir: Configure cache storage location.
- http_access: Set rules for allowing or denying access.
- Save the file and exit.
Starting and Enabling Squid
Start the Squid service and enable it to start on boot:
sudo systemctl start squid
sudo systemctl enable squid
Check the status of Squid Proxy:
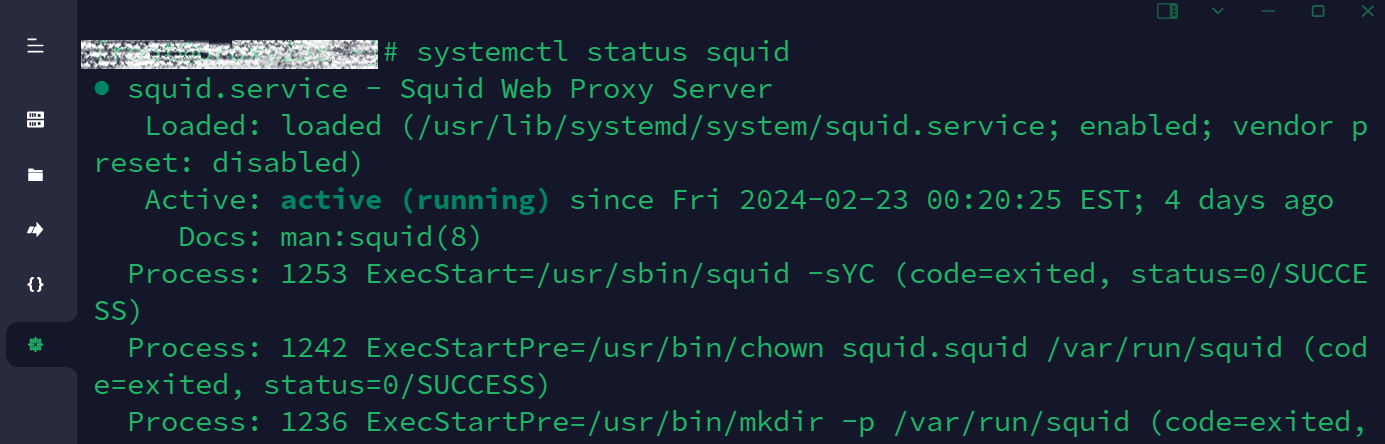
Testing Squid
To verify that Squid is working correctly, use the following commands:
curl -x http://localhost:3128 https://example.comReplace https://example.com with the URL you want to test.
Setting Environment Variables
For system-wide proxy settings, configure the environment variables:
Ubuntu
export http_proxy=http://localhost:3128
export https_proxy=http://localhost:3128
CentOS and RHEL
echo "http_proxy=http://localhost:3128" >> /etc/environment
echo "https_proxy=http://localhost:3128" >> /etc/environment
Applying Changes
To apply the changes, either restart your system or run:
source /etc/environmentVerifying Proxy Settings
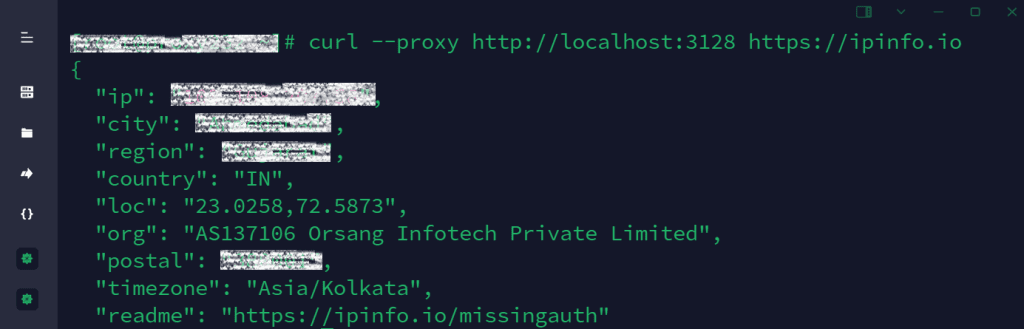
Check if the proxy is correctly configured:
curl https://ipinfo.io/ipYou should see the IP address associated with your Squid proxy server.
FAQs
Q1: What is Squid?
Squid is an open-source proxy server that provides caching, filtering, and forwarding capabilities.
Q2: Why use Squid?
Squid improves network performance, enhances security, and allows fine-grained access control.
Q3: Can I customize Squid’s configuration?
Yes, you can tailor Squid’s settings in the squid.conf file.
Q4: How do I test Squid?
Use the curl command with the -x option to test Squid’s functionality.
Squid Documentation
- The official Squid project provides comprehensive documentation. You can find details about configuration, usage, and best practices in the following sections:
- squid.conf Reference Manual: This manual covers all the Squid configuration directives.
- Programming Guide: Explore the programming aspects of Squid.
- Non-English Documentation:
- German: Squid Proxyserver Administrationshandbuch: A guide for administering Squid Proxy servers.
- Spanish: Manual de Instalacion de Servidor Proxy Web con Ubuntu Server y Squid: Installation manual for setting up a web proxy server with Squid on Ubuntu Server.
Conclusion
Setting up a Squid proxy using the CLI provides granular control over network traffic. Remember to adjust the proxy settings based on your organization’s policies or privacy requirements.